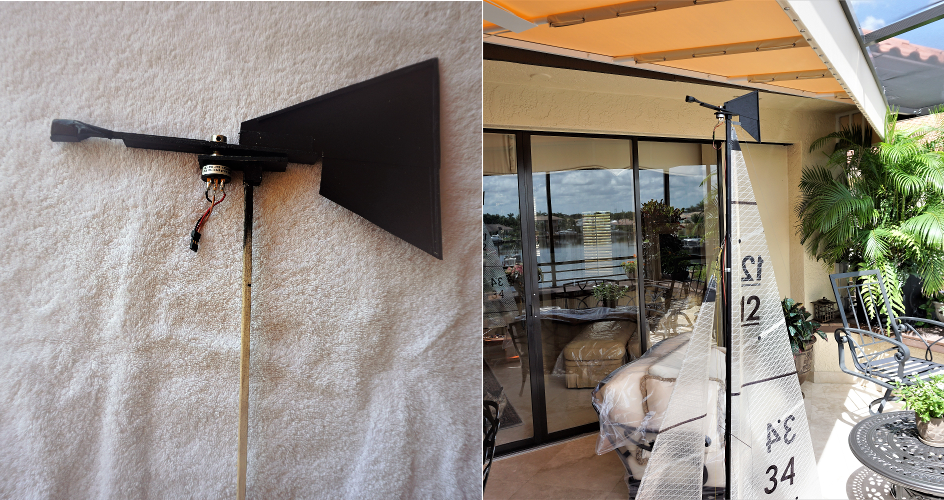
Analogue Wind Vane
This analogue voltage wind vane can be used with any sensor providing a analogue voltage linearly proportional to the wind direction.
WNDVN_TYPE = 3, this wind vane relies on the reading voltage on a ADC pin defined by WNDVN_DIR_PIN. The maximum and minimum voltage should be set. This can be done by manually by setting WNDVN_DIR_V_MIN and WNDVN_DIR_V_MAX but it is recommended that automatic calibration is used. To trigger this the WNDVN_CAL parameter should be set to one. A message will appear saying “WindVane: Calibration started, rotate wind vane” the vane should then be slowly rotated for 30 seconds until “WindVane: Calibration complete” is seen. If the wind vane is set up correctly you should see the wind direction value increase as you turn the vane clockwise, it should reach both zero and 359 degrees. If this is not the case double check the sensor is wired such that a clockwise movement provides a increasing voltage and check the min and max voltage parameters are sensible. The vehicle should then the pointed north so that the yaw angle is zero and the vane set such that it points to the front of the vehicle as if it were head to wind. The negative of wind_dir value should then be set to the WNDVN_DIR_OFS parameter. The wind_dir value should now be zero and read 90 degrees when turned 90 degrees clockwise and read 270 degrees when turned 90 degrees anticlockwise. If your sensor has a large dead zone where it passes from maximum to minimum voltage some improvement may be gained by setting WNDVN_DIR_DZ to a suitable angle, a dead zone value may be provided in the sensor’s data sheet.
Wind vane construction
A DIY wind vane can be constructed from a 360 degree rotation potentiometer. A Bourns 6630S0D-C28-A103 has been used with success and is easy to get hold of. However it takes quite a large force to rotate. A more free-turning one would provide better results. If you find a better one please tell us! The outer pins of the potentiometer should be wired to a voltage less than the voltage rating of the ADC pin you plan on using. If using a 6.6V ADC the potentiometer can be wired to 5V and ground. If using a 3.3V ADC the potentiometer can be wired to 3.3V if available or for a 10k potentiometer a 5.6k resistor can be used to drop 5V down to less than 3.3V. As the potentiometer passes from maximum to minimum output voltage the wiper pin is briefly floating, it is recommended to use a high value pull down resistor of around 100k. The outer pins of the potentiometer should be connected in such a way that rotating the potentiometer clockwise will result in an increasing voltage.
Note
In testing so far it has been found that the potentiometer is not very accurate. An accuracy of +- 20 degrees around the a full rotation is acceptable. The potentiometer should however be repeatable.
A wind vane should be constructed to provide the maximum force to turn the potentiometer. A larger wind vane will be more effective in lighter winds than a smaller one. It is recommended to mount the vane as high as possible so that it is in clear wind. The vane must be balanced about the pivot point so that the heel angle of the craft does not change the reading. The weight of a well balanced vane has little effect; it can be directly mounted to the shaft of the potentiometer.
