ModalAI VOXL 2
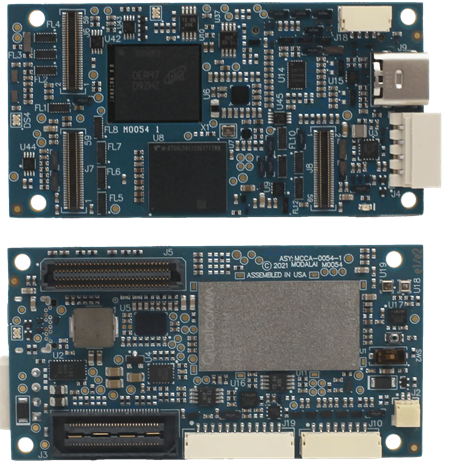
This article explains how to setup a ModalAI VOXL 2 to work with ArduPilot. This also applies to the VOXL 2 Flight Deck, Starling 2 and Starling 2 Max
Note
VOXL 2 support is available in ArduPilot 4.6 (and higher).
What to Buy
Any of the following products can run ArduPilot
Learning About the VOXL 2
The setup and configuration of the VOXL 2 is very different from the other autopilots supported by ArduPilot. Please consider reading the VOXL Developer Bootcamp instructions before proceeding further
Connecting to the VOXL 2 via USB
Please follow these instructions to connect an Ubuntu PC to a VOXL2
Connect a USB C cable from the Ubuntu PC to the autopilot. On the Starling 2 Max, the USB C port is just below the bright green LED on the back of the vehicle
Follow ModalAI’s Setting Up ADB instructions
If after running “lsb devices” an error similar to, “no permissions (missing udev rules? user is in the plugdev group)” please see the “Permission Issues” section at the bottom of the Setting Up ADB instructions
Test logging into the VOXL 2 using
adb shellandvoxl-version
Connecting to the VOXL 2 via Wifi
Power on the vehicle or autopilot
By default, most VOXL 2 will create a Wifi Access Point soon after startup named “VOXL-xxxxxxxxxx” (where “xxxxxxxxxx” is the MAC address of the VOXL 2)
Connect to the Wifi Access Point from your PC, the default password is “1234567890”
To connect to the VOXL Web Portal, open a web browser to http://192.168.8.1
More details on the Wifi setup can be found here
Installing ArduPilot
ModalAI’s official instructions for installing ArduPilot are here.
Pre-built installation packages (.deb files) for Ardupilot can be found here on firmare.ardupilot.org:
Install the ArduPilot firmware:
Ensure the Ubuntu PC has a good internet connection
Connect the PC to the vehicle via USB (see above)
Disable the px4 service using,
adb shell systemctl disable voxl-px4Open a web browser and click on the “latest” or “beta” link above that is suitable for your vehicle type and download the .deb package
Open a terminal and find the .deb package downloaded above
Push the .deb file to the autopilot’s root directory using,
adb push *.deb /- Log onto the VOXL2 and install the deb package
adb shellcd /dpkg -i voxl-ardupilot_*.debexit
Setup the default parameters (optional because you may do it later via a GCS instead)
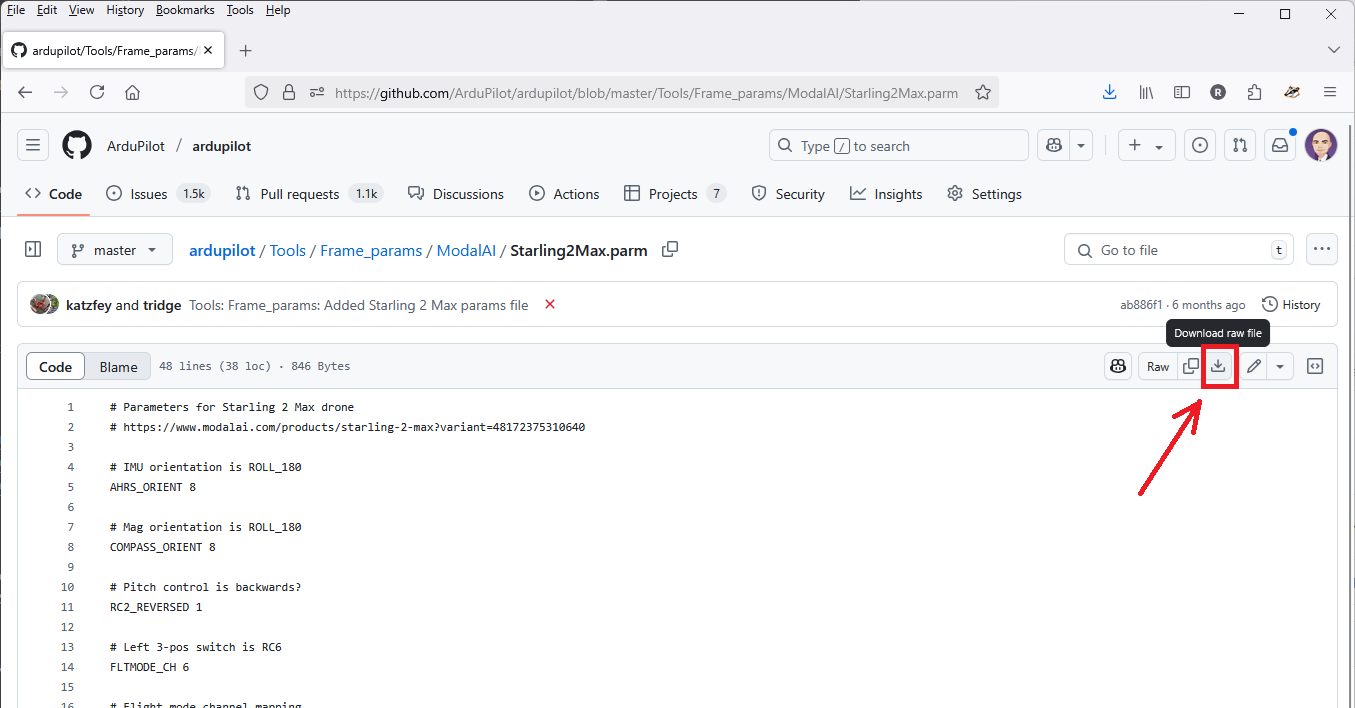
Download latest parameter files for your frame from here (be sure to use the “Download raw file” button)
From the Ubuntu PC, push the parameter file to the autopilot’s /data/APM directory using,
adb push *.parm /data/APM- Log onto the VOXL2 and add a link to the default parameters in /data/APM
adb shellcd /data/APMln -s Starling2Max.parm defaults.parmexit
- Log onto the VOXL2 and enable the ArduPilot service
adb shellsystemctl enable voxl-ardupilotsystemctl start voxl-ardupilotexit
Reboot the vehicle, connect with a GCS and complete the vehicle setup including accelerometer, compass and RC calibration
VOXL Camera Configuration
Details coming soon
Autopilot Configuration
Connect to the autopilot with a ground station (i.e. Mission Planner) and check that the following parameters are set
SERIAL2_PROTOCOL = 2 (MAVLink2). Note this assumes the camera is connected to the autopilot’s “Telem2” port.
SERIAL2_BAUD = 921 (921600 baud)
Optionally set SERIAL2_OPTIONS = 1024 (Don’t forward mavlink to/from) to disable the camera’s odometry messages from being sent to the GCS
Optionally set MAV3_EXTRA3 = 0 to disable sending the SYSTEM_TIME message to the camera which has been known to cause the camera to lose its position estimate (e.g. quality falls to -1). Note this assumes the camera is connected to the autopilot’s second mavlink port (e.g. usually Telem2)
VISO_TYPE = 3 (VOXL)
Set VISO_POS_X, VISO_POS_Y, VISO_POS_Z to the camera’s position on the drone relative to the center-of-gravity. See sensor position offset compensation for more details
Optionally increase VISO_QUAL_MIN to 10 (or higher) to only consume estimates from the camera when the quality is 10% (or higher)
If only the VOXL 2 camera will be used for position estimation and heading (e.g. No GPS):
EK3_SRC1_POSXY = 6 (ExternalNav)
EK3_SRC1_VELXY = 6 (ExternalNav)
EK3_SRC1_POSZ = 6 (ExternalNav)
EK3_SRC1_VELZ = 6 (ExternalNav)
EK3_SRC1_YAW = 6 (ExternalNav)
After the parameters are modified, reboot the autopilot. Connect with the ground station and (if using Mission Planner) right-mouse-button-click on the map, select “Set Home Here”, “Set EKF Origin Here” to tell ArduPilot where the vehicle is and it should instantly appear on the map.
For indoor/outdoor transitions (e.g. VOXL camera indoors, GPS+Compass outdoors):
EK3_SRC1_POSXY = 3 (GPS)
EK3_SRC1_VELXY = 3 (GPS)
EK3_SRC1_POSZ = 1 (Baro)
EK3_SRC1_VELZ = 0 (None)
EK3_SRC1_YAW = 1 (Compass)
EK3_SRC2_POSXY = 6 (ExternalNav)
EK3_SRC2_VELXY = 6 (ExternalNav)
EK3_SRC2_POSZ = 6 (ExternalNav)
EK3_SRC2_VELZ = 6 (ExternalNav)
EK3_SRC2_YAW = 6 (ExternalNav)
RC6_OPTION = 90 (EKF Pos Source) to allow the pilot to use channel 6 to switch between Source1 (e.g. GPS+Compass) and Source2 (e.g. VOXL camera). The switch’s low position is Source1 (GPS+Compass), middle position is Source2 (e.g. VOXL), and high position is Source3 (e.g. None) which will lead to the EKF losing its position estimate and triggering an EKF failsafe. To avoid pilot error triggering an EKF failsafe you may wish to copy EK3_SRC1_xxx or EK2_SRC2_xxx to EK3_SRC3_xx.
RC7_OPTION = 80 (Viso Align) to allow the pilot to use channel 7 to re-align the camera’s yaw with the AHRS/EKF yaw before flight. Re-aligning yaw before takeoff is a good idea or loss of position control (aka “toilet bowling”) may occur.
After the parameters are modified, reboot the autopilot.
More details on GPS/Non-GPS Transitions can be found here
To use an optical flow and rangefinder for backup in case the VOXL fails, a Lua applet for ExternalNav/Optical flow transitions is here