AM32 Drone CAN ESCs

The AM32 ESC firmware is open source ESC firmware for use on multicopters and rovers. DroneCAN support was added in late 2024
Where to Buy
AM32 ESCs that support DroneCAN
More ESCs may be found from the AM32 targets.h file (seach for _CAN)
ArduPilot Connection and Configuration
The ESCs should be connected to the autopilot’s CAN port. Below shows the ESCs connected to the autopilot’s CAN1 port but CAN2 may also be used.

To enable communication with the AM32 ESCs using DroneCAN, set the following parameters:
Set CAN_P1_DRIVER = 1 (First driver) to specify that the ESCs are connected to the CAN1 port
Set CAN_D1_PROTOCOL = 1 (DroneCAN)
Set MOT_PWM_MIN = 1000 and MOT_PWM_MAX = 2000 so ArduPilot uses an output range that matches the ESCs input range
Set
SERVOx_FUNCTIONto each motor channel (e.g. 33 - 40 for motors 1 - 8). This is automatically configured when setting frame class/type. If a motor channel isn’t assigned to a servo output, commands won’t be sent to the associated ESC.CAN_D1_UC_ESC_BM is a bitmask that determines which servo output channels are transmitted over CAN. For quadcopters this is normally “15”
CAN_D1_UC_ESC_OF allows for more efficient packing of ESC command messages when ESCs are connected to higher servo outputs (e.g. 5 to 8). For most vehicles this can be left at zero
CAN_D1_UC_ESC_RV allows specifying which ESCs support spinning in reverse
ESC Firmware Updates
The latest firmwares can be found on the am32.ca downloads page
To update the ESCs firmware using Mission Planner:
Download the firmware from the am32.ca downloads page
Power on the autopilot and ESCs
Connect to the autopilot using Mission Planner
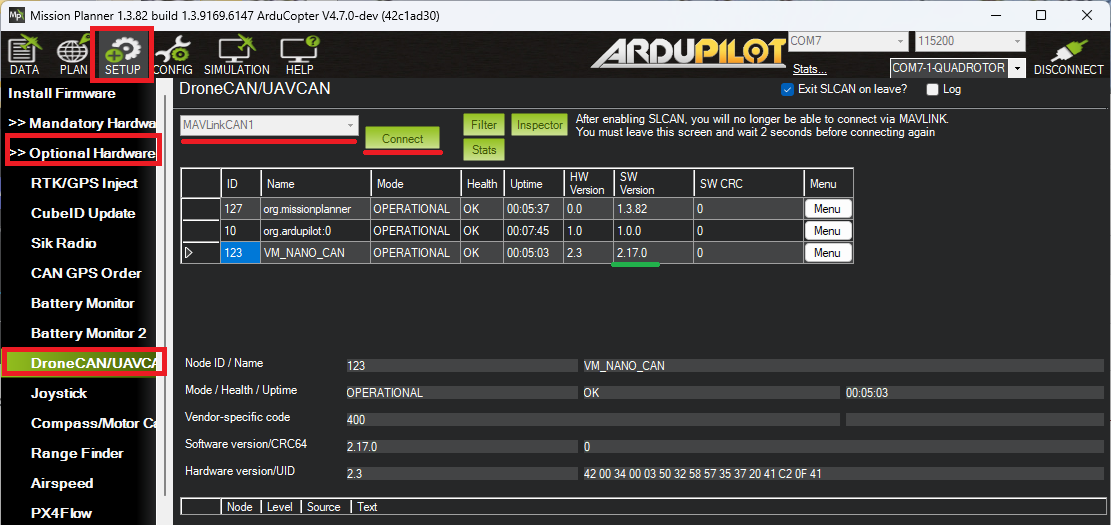
Open Mission Planner’s Setup, Optional Hardware, DroneCAN/UAVCAN page
Select “MAVLinkCAN1” from the drop-down (assuming the ESCs are connected to the autopilot’s CAN1 port) and press Connect
The ESCs should appear in the list of connected devices
For each ESC listed, push the “Menu” button on the right and select “Update”
When asked, “Do you want to search the internet for an update?”, push “No” and select the firmware downloaded above
After the firmware is uploaded, check the “SW Version” column shows the expected version
ESC Configuration
If the ESCs are already connected to the autopilot (via DroneCAN), they can be configured using Mission Planner’s DroneCAN/UAVCAN page or the DroneCAN GUI Tool. Alternatively, the AM32 configurator can be used by directly connecting to the ESC’s PWM connection.
In most cases at least some of the following parameters will need to be changed:
ESC_INDEX: The motor number - 1. For multicopters the motor number and position are shown on the ESCs and Motors wiki page
DIR_REVERSED: the motor direction. Use Mission Planner’s motor test page to check the direction and change this parameter if necessary
MOTOR_POLES: the number of poles in the motor
MOTOR_KV: the motor’s KV rating
To change the above parameters using Mission Planner:
Power on the autopilot and ESCs
Connect to the autopilot using Mission Planner
Open Mission Planner’s Setup, Optional Hardware, DroneCAN/UAVCAN page
Select “MAVLinkCAN1” from the drop-down (assuming the ESCs are connected to the autopilot’s CAN1 port) and press Connect
For each ESC listed, push the “Menu” button on the right and select “Parameters”
Change the parameters as required and press, “Write Params”
Logging and Reporting
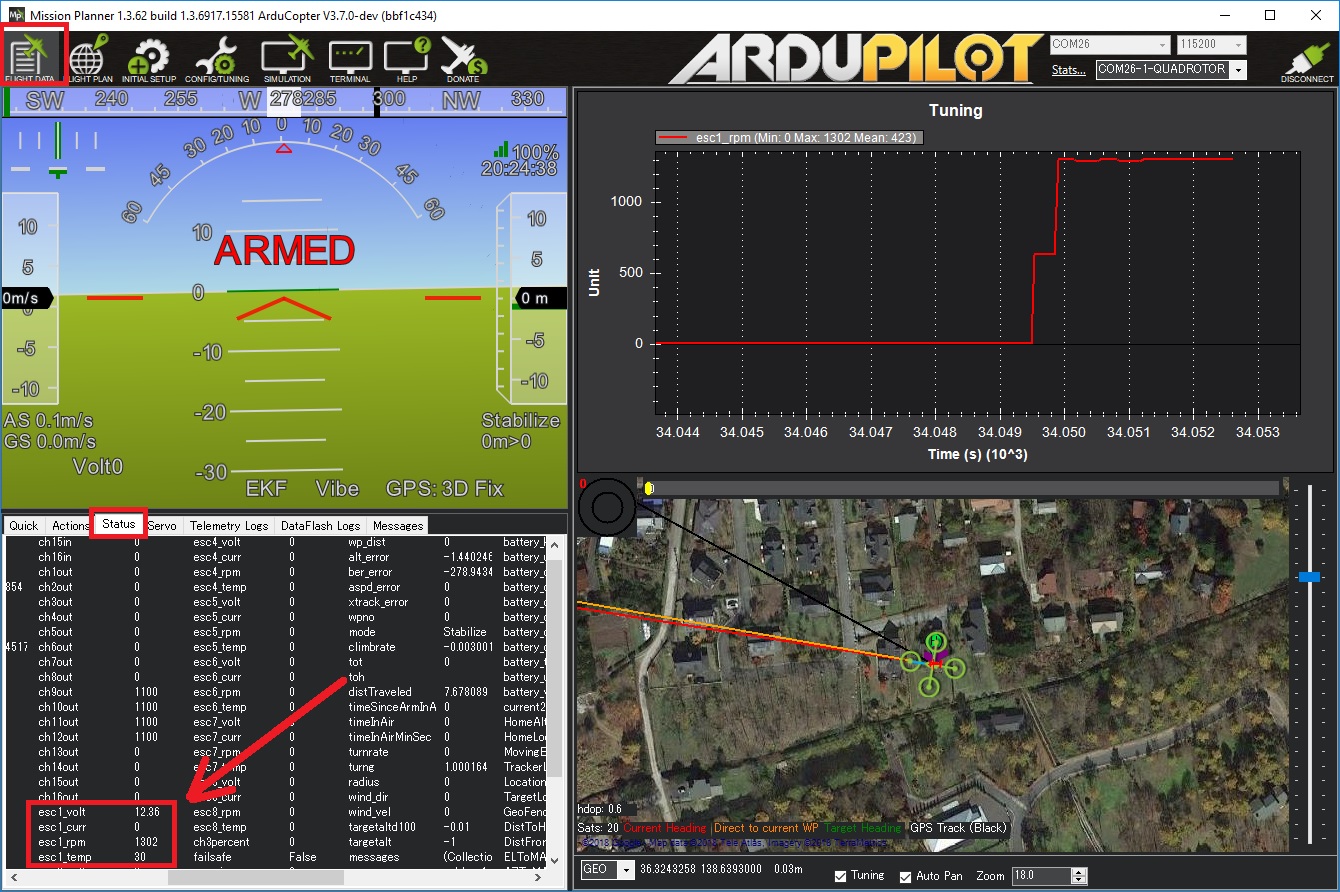
ESCs RPM, voltage, current and temperature are recorded in the autopilot’s onboard log and reported in real-time to the ground station