Calibration: Compass Calibration
This article explains how to use APM Planner to calibrate your autopilot’s compass to work with your vehicle configuration. For other calibration tasks see Autopilot calibration.
1 Prerequisites
Before preforming setup, ensure that:
The vehicle is completely built to flight condition.
2 Select option
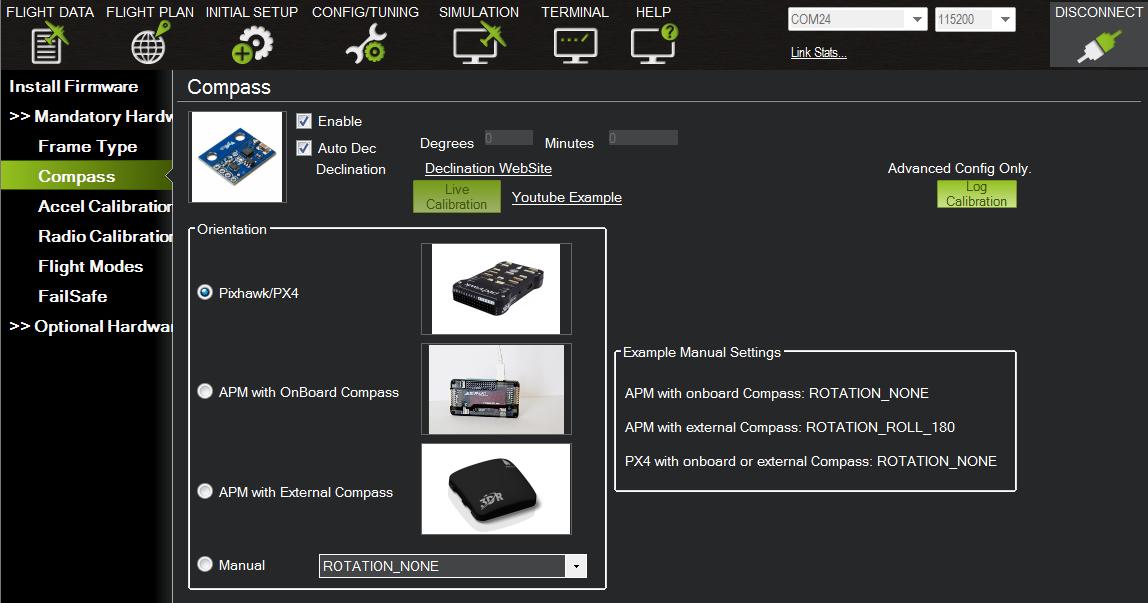
Under Orientation, select your autopilot configuration: Pixhawk, APM 2.5 and earlier, or APM 2.6 with 3DR GPS+Compass. Ensure that the option to Enable the compass and allow Auto Declination are selected as shown below.

To perform manual declination, follow the link to the Declination Website. Find the two numbers listed as the Magnetic Declination and input the first number in the Degrees field and the second number in the Minutes field.
3 Calibrate
Select Live Calibration to begin calibration. APM Planner will start a timer. During these next 60 seconds, hold your vehicle in the air and rotate it slowly so that each side (front, back, left, right, top and bottom) points down towards the earth for a few seconds in turn. Check out this video for a demonstration of how to calibrate the compass.
When the calibration period ends, APM Planner will display the resulting offsets. For APM, all three values should be between -150 and 150. For PX4 and Pixhawk, values may be greater than 150 and less than -150.
4 Advanced compass calibration (copters)
For more information about advanced compass calibration for copters, click here. For a general discussion of ways to reduce magnetic interference on your copter, click here.